Saturday, January 29, 2011

Bean Bag Tutorial

I realize bean bags are pretty self explanatory, but the kids and I threw these together last night and they were so fun! I am just learning how to sew, and this tutorial could benefit someone who is a newbie like me!


Supplies needed:

Fabric squares - 2 for each bean bag
Thread
Beans 

**I used 5" squares and black eyed peas. One bag of black eyed peas filled approximately 3 1/2 bags.**

I had purchased a couple of baggies of fabric squares from Designs by Jamie a while back and they were the perfect size for this project. I went with some funky color combos. Colors that were the same and/or looked good together, but not necessarily 'matching'. 

First, place fabric squares right side together and pin. Sew all around the 4 edges leaving a 2" opening for turning. 
Trim the corners and turn bean bag right side out. Now, place a funnel in the opening and fill about 3/4 full of beans. I used black eyed peas because that is what I had on hand, but you could use any kind of bean you would like. If you want to fill them fuller you may have to hand stitch the opening. The kids can help with this part too. Mine loved it. (I got a 4 pack of funnels from Wal-Mart for $1.)
Now just fold in the open edge and do a little top stitch! So simple, and the kids absolutely loved playing with the bean bags.


I'm already planning on who to gift these to! These would be perfect for my nieces and nephews as well as my kids friends. You could do themes, colors, fabric appliques.... 

If you don't want to make these yourself I would love to do it for you! Click on the contact me tab above and we can work something out. Thanks!

Wednesday, January 26, 2011

Tea Bag Valentine's

I just couldn't resist sending you over to Tatertots and Jello for this cute guest post on Valentine tea bags.
And you could always put these together with my previous post on tea bag wallets.

Tuesday, January 25, 2011

Strawberry Bread

This recipe is actually from a Wilton cake pan. It is super yummy and a little more like cake than bread. A simple idea for a hostess, get well, or thank you gift or just to say 'I'm thinking of you.' When I make the recipe for my family, I pour most of the batter in an 11"x6" pan and the rest in a small bread pan. Then after the bread cools, wrap it in plastic wrap and tie a pretty ribbon around it.
Strawberry Bread:

3 Cups all purpose flour
1 1/2 cups granulated sugar
1 tbsp cinnamon
1 tsp baking soda
1/2 tsp salt
2 packages (10 oz each) frozen strawberries including juice
4 eggs
1 1/4 cups vegetable oil
1 1/4 cups chopped walnuts or pecans

(**I have found it tastes best with fresh strawberries and pecans**)

Preheat oven to 325 degrees F. Spray pan with vegetable pan spray. In a large bowl, mix flour, sugar, cinnamon, baking soda and salt together. Set aside. In a separate bowl, combine strawberries with juice, eggs and oil. Pour strawberry mixture into flour and stir just until flour is absorbed. Stir in nuts. Pour into prepared pan; fill 1/2-2/3 full. Bake 50-60 minutes or until toothpick inserted in middle comes out clean. Cool 20 minutes in pan. Cover pan with a flat surface and turn pan over. Bread releases on to flat surface. Makes 8 cups batter.

This is good plain or topped with whipped cream and strawberries. Enjoy!

Valentine Flask

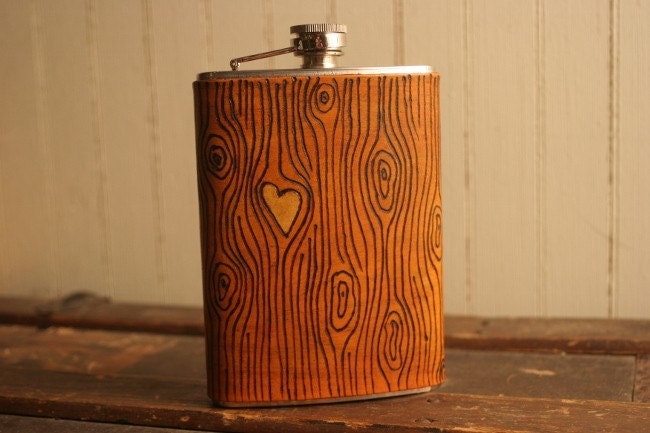
I have never been much of a drinker and my husband isn't either, but for some reason I have always been drawn to interesting and different flasks. I have been brainstorming different uses for them besides alcohol just so I can get this one for my husband.
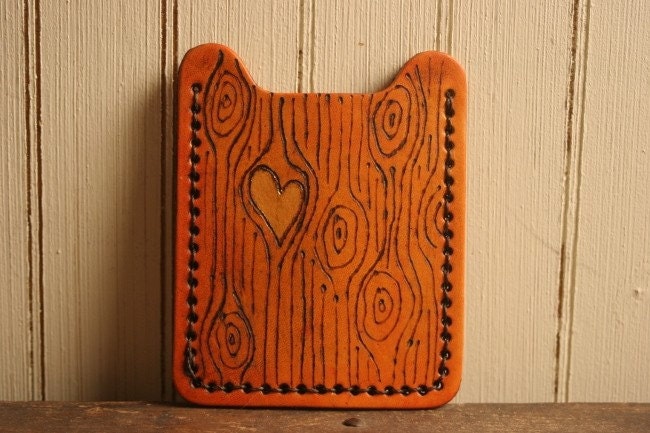
Isn't it unique? It would be so great for Valentine's Day with that sweet little heart on it. It is made by Moxie and Oliver, and they have many other fabulous gift ideas for him in their shop. I am really loving the woodgrain pattern and may just have to get the wallet/ money clip instead. 


Monday, January 24, 2011

For the Expecting Mama

 I made this onesie and card for my cousin who is expecting in July! I am so excited for her. Babies are so fun and I love fabric appliqué onesies. And doesn't the momma on the card look so trendy?! 
 The card die cut was made on my cricut machine using the New Arrival cartridge, and I simply put some foam sticky dots on the back and affixed it to some cardstock. 
As for the fabric applique I did a quick google search and found a tutorial from Totally Smitten Mama. I do mine a little differently, but this is the same basic idea.
If you aren't up to making one I would love to do it for you! I usually charge $10 for a onesie and $2.50 for cards. Click the contact me tab above for my e-mail!

Sunday, January 23, 2011

Valentine Watch

I received this watch as a gift from my hubby last year for Valentine's Day. Ever since we have been together we have always skipped this particular holiday. Neither of us was really into it. For some reason last year my husband surprised me with a gift. So sweet! This watch has become one of my favorite pieces of jewelery and was made by my auntie over at Girly Muse.

 Girly Muse does great work and most of it is one of a kind and/or custom work. She has a few things for sale on her blog but I'm sure she would do something more for you if you asked. I also found this one from Thunder Bear Spirit Design.

Saturday, January 22, 2011

Superhero/ Princess Cape

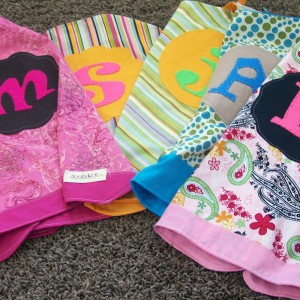
Several years ago I came up with the idea that I would love to have capes made for my kids and their friends made with Velcro at the neckline so I could stop tying blankets around their necks. At the time I did not know how to sew, so I commissioned someone else to make them for me.
 They turned out so cute and doohikey baby did a wonderful job putting the project together for me. (She is no longer active on etsy.)
My three year old had a friend with a birthday last week and so I decided to try and make little C a cape of her own.
 I love it! My husband was not a fan of the fabric combo when I brought it home, but I think it is perfect for this. I actually originally got the fabric to make a dress for my littlest, but never got around to it.
 All the kids who I originally got these for absolutely love them and still play with them. They are perfect for all types of pretend play. Princes, princesses, and superheroes will love their personalized capes!
If you want one of your own I just did a quick google search for 'free cape tutorial' and came up with this one. Otherwise I would love to make you one! The cost would be $18.50 and you can pick your colors/patterns/shapes/letters. My email is in the contact me tab above.